Setting up your site with Jekyll.
30 Aug 2024
.
tech .
#tutorial
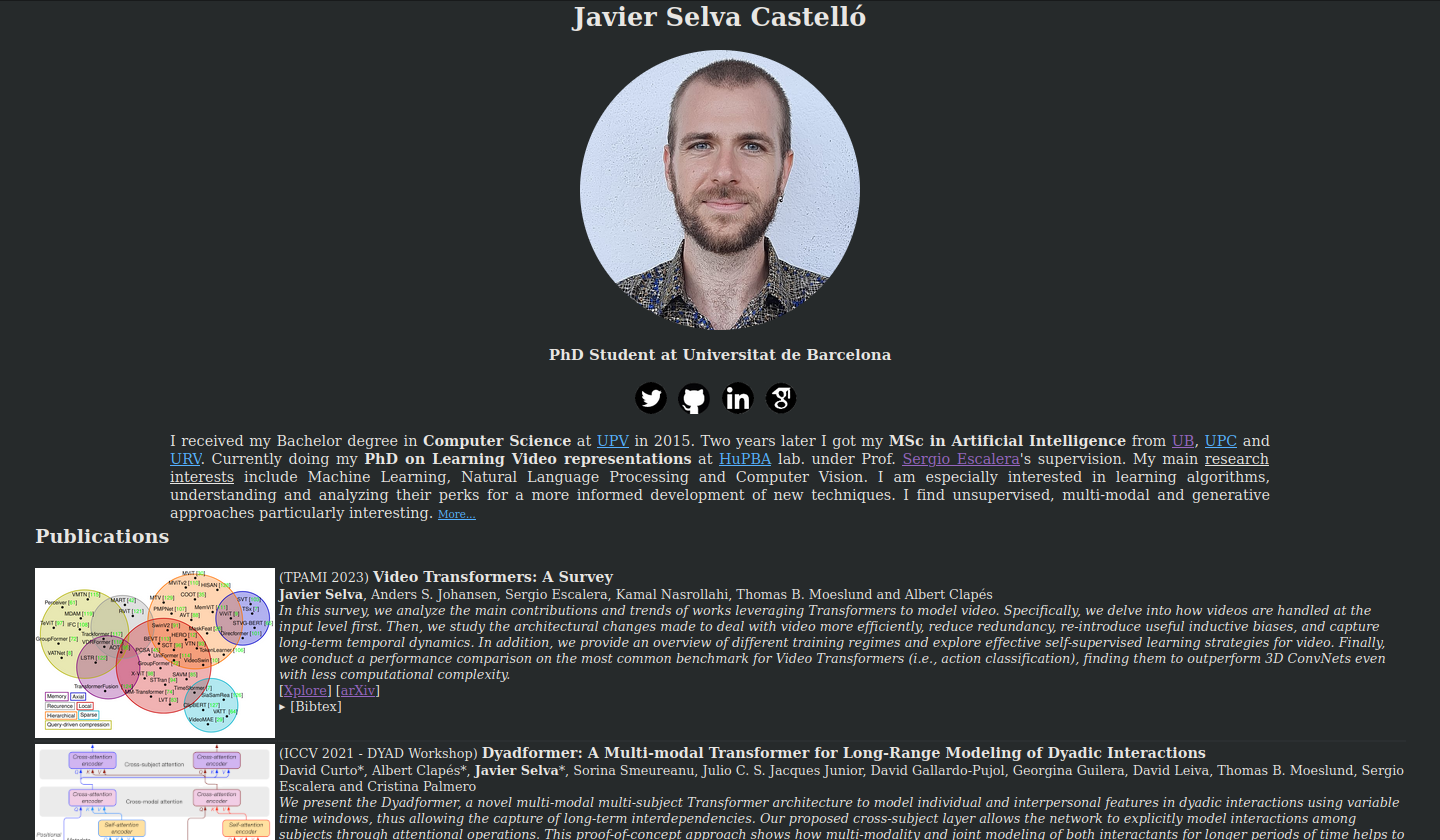
I recently migrated my simple website (a single plain .html you can see below) into something a bit more stylish.
I also wanted to start a blog where I could post about the papers I read or the things I learn. To do that, I was going to need a way to use some templates that would ease the publication process, so I could focus on just creating the content, which is already quite a bit of work.
Reading up a bit, turns out you can create these sorts of dynamic websites using Jekyll. And I emphasize dynamic because what you’re actually doing is compiling your dynamic website into a static one that then you can upload to your github page.
It is frankly easy to set up.
First you need to install Jekyll.
You should probably follow the installation guides on the official website. I actually missed those and ended up installing it using apt install which throws a bunch of permission errors when trying to use the tool later on. I had to install the theme’s dependencies on a folder in the /home directory instead of within the package folder.
Installing using gem instead should be better for you, as most solutions I found to solve my issues pointed to using gem command to solve them. Which I couldn’t do as I installed it using apt.
Then you find a theme you like.
You can also start your site from scratch, if that’s your kind of thing. I know my way around web development but I am far (very far)
away from knowing how to deal with styles and css. So I headed into Jekyll Themes and searched around for some
keywords like “personal”, “academic” and so on. After too much pondering, I went for Le4ker’s Theme. If you have not yet created your page’s repo you can directly fork the github repository containing the theme you like, rename it to be yourdomain.github.io and work from there. I had already created my repo and domain, and after a bit of googling I didn’t seem to find a way to migrate that to a different repository, so I just downloaded it as a zip file and replaced my original repo contents with that.
Once it is on your computer, either by downloading or cloning, you have to install the plugins for that theme. You simply go into the folder containing the theme and run bundle install. As usual, you fight with some or other package dependency and problematic folder permission issues, but stack-overflow is your friend. Once that is done you can start working on your site.
Just in case you ran into the same permission issues I had, I solved it by simply exporting an appropriate path where bundle files could be installed (somewhere within my home directory):
export BUNDLE_PATH=~/path/to/bundle/install/dir/
bundle install
But remember, if you needed to do this for the installation, you may need to do it again every time you want to run your web locally. To avoid having to export every time, you may want to simply include the export in the .bashrc file.
Jekyll’s Basics.
You’ve got your htmls, your layouts, your imports, and your posts. I recommend giving a quick read to the quickstart documentation (particularly the posts under Content and Site structure) to get a quick idea of the basics. It won’t take you more than an hour.
As a quick summary, you’ve got:
- The config.yaml file, which includes all relevant variables for the site, such as the title, the author and other relevant information Jekyll (or you) can use to build the site.
- Includes. These are things such as headers, navigation bars, formatted posts… and other .html templates that you expect to reuse. Similarly, in the template I am using, you have got here things like a list of blog posts or publications to be included within the home-page.
- Layouts. These are the main
.htmlstructure of the different pages in your site. They define the main html for the sections, blog posts, etc. Both layouts and includes make use of Liquid templating language to include the dynamic content, either through plain variables such asSetting up your site with Jekyll.or more complex instructions such asiforforstatements. - Content. These can take the form of
.mdor.htmlfiles, and include a header, also known as front matter, which is metadata used when creating pages. For instance, the home site within index.html has a header indicating that it uses theindexlayout, and everything following the front matter will get included within that layout wherever the{{ content }}variable is invoked. This is also used to build blog posts, as each post will have a set of metadata, such as the category, layout and tags, all included within the front matter, followed by the actual contents of the file.
Less important to know, but also relevant:
- A css folder where you’ll store all your styles for the site.
- An assets folder, where you’ll store all images and other relevant files (e.g., I’ve got some pdfs).
- A _site folder, which will store the final site once you compile the dynamic website through Jekyll.
Creating multiple blogs.
Normally, there’s a default blog for Jekyll sites. You simply create a blog and post layouts, and then create a _posts folder where you place all your posts in the form of .md files, written in markdown. However, I wanted to have something similar to multiple blogs, as I wanted one that would allow me to add new publications as if they were posts.
For that I followed this tutorial, but instead of using categories as the telling variable to separate posts from one blog and the other, as I was going to use different layouts for each, I decided to use that variable to tell apart the posts when listing them in the different blog/publication sections. Something like this:
{% for post in site.posts %}
    {% if post.layout == "paper" %}
        {% include paper-list.html%}
    {% endif %}
{% endfor %}
Note that here, the included paper-list.html represents just an element in said list. In this manner, I make sure that every post I am trying to include in the list is one publication, and not a random blog post.
Other than that, you simply create one folder for each blog, and an individual _posts folder in each.
Writing posts
Posts are created in markdown (as you do for github readme pages). While you can also use html for this purpose I find doing it in markdown helps me focus on the actual contents without worrying about the proper formatting and all tags in html. You can find some basics on how to write these posts here. For this blog it is more than fine. You just write the content formatting it appropriately and it will later get translated into the proper html.
However, for my publications I needed to play a little bit with the cards Jekyll was dealing me. There are probably more elegant solutions but this is what I came up with. When including a publication, I create a new .md file, the contents of which are only the abstract (or in my case, a short version of the abstract) for that paper, and everything else (authors, publication year, conference, links…) are included as part of the front matter. One example of front matter I use is the following:
---
layout: paper
title: Folded Recurrent Neural Networks for Future Video Prediction
category: publications
tags: ["paper","rnn","frnn","cnn","frame prediction","video"]
conference: "ECCV 2018"
authors: ["Marc Oliu", "Javier Selva", "Sergio Escalera"]
links:
  PDF: "https://openaccess.thecvf.com/content_ECCV_2018/papers/Marc_Oliu_Folded_Recurrent_Neural_ECCV_2018_paper.pdf"
  Supp: "none"
  arXiv: "https://arxiv.org/abs/1712.00311"
  Code: "https://github.com/moliusimon/frnn"
  Website: "none"
bibtex: ["@inproceedings{oliu2018folded,","title={Folded recurrent neural networks for future video prediction},","author={Oliu, Marc and Selva, Javier and Escalera, Sergio},","booktitle={Proceedings of the European Conference on Computer Vision (ECCV)},","pages={716--731},","year={2018}","}"]
image: "frnn.png"
---
You can create as many variables as you need and then reference them from the html templates. The liquid templating that I use to translate that into the final site you see (the paper-list.html I reference above) looks something like this:
<div style="display: flex;">
<img src="/assets/img/papers/{{ post.image }}" style="max-width: 100%; height: 100%; flex: 0 0 auto; margin: 0 10px 0 0;">
<div>
({{ post.conference }})
<h2><b>{{ post.title }}</b></h2><br/>
</div>
</div>
{% for author in post.authors %}
{% if forloop.index == forloop.length %}
and
{% endif %}
{{ author }}
{% unless forloop.index == forloop.length %}
,
{% endunless %}
{% endfor %}
.
<br/>
{% for link in post.links %}
{% unless link[1] == "none"%}
[<a href="{{ link[1] }}" target="blank">{{ link[0] }}</a>]
{% endunless %}
{% endfor %}
<br/>
<em>{{ post.content }}</em>
<details><summary>↓[Bibtex]↓</summary>
<div style="background-color:#444444;">
{% for b_line in post.bibtex %}
{% unless forloop.index == 1 or forloop.index == forloop.length %}
 
{% endunless %}
{{ b_line }} <br/>
{% endfor %}
</div>
</details>
<br/>
<hr style="border-color: white; border-width: 1px; margin: 10px 0;">
And that mostly sums up the basics of building your page with Jeckyll. There are other interesting issues to address, such as handling pagination when handling multiple posts. But I’ll leave those for a future post.
Deploy the site to GitHub
Finally, the moment has come! Your website looks awesome and is time for everyone to see. Once you’ve done all of the above (make sure the gemfile was generated, and that you ran bundle install) you can start the process of uploading it to your repository.
For this process, I followed this guide. First of all, you need to edit the Gemfile to add github support by ading:
source 'https://rubygems.org'
gem 'github-pages'
(The first line may already be there, in which case you do not need to add it). After that, you need to re-run bundle install so the github-pages package is properly installed. In my case, this caused some dependency issues: my Gemfile included some specific versions for different libraries such that they will allow for the site to work, but none of those seemed compatible with github-pages. So I removed the versions for all packages and let bundle figure it out. I may regret this down the line, but so far it seems like everything is working as expected.
Remember to add Gemfile.lock to .gitignore. Finally, simply add all to git and push.
git add --all
git commit -m 'first jekyll site commit'
git push
And that’s it!! Now you’re all set and can start focusing on creating new content for your blog!!

Javier Selva has a background of computer science and currently specializes in Machine Learning. In particular he is passionate about NLP, CV and self-supervised learning with Transformers.